List row

v1.1

List rows combine a set of content inside a horizontal layout.
  • CSS
  • Marko
  • React

Anatomy

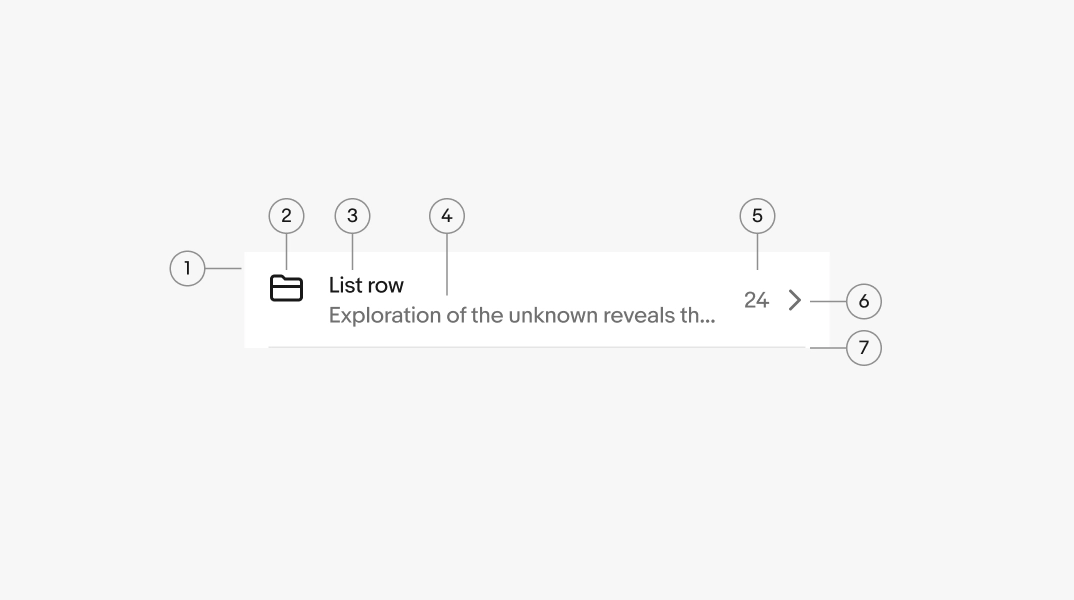
A list row diagram with 7 elements: 1. Container, 2. Lead element, 3. Title, 4. Secondary text, 5. Trailing text, 6. Trailing element, 7. Divider.
  1. Container
  2. Lead element
  3. Title
  4. Secondary text
  5. Trailing text
  6. Trailing element
  7. Divider

Properties

Lead element

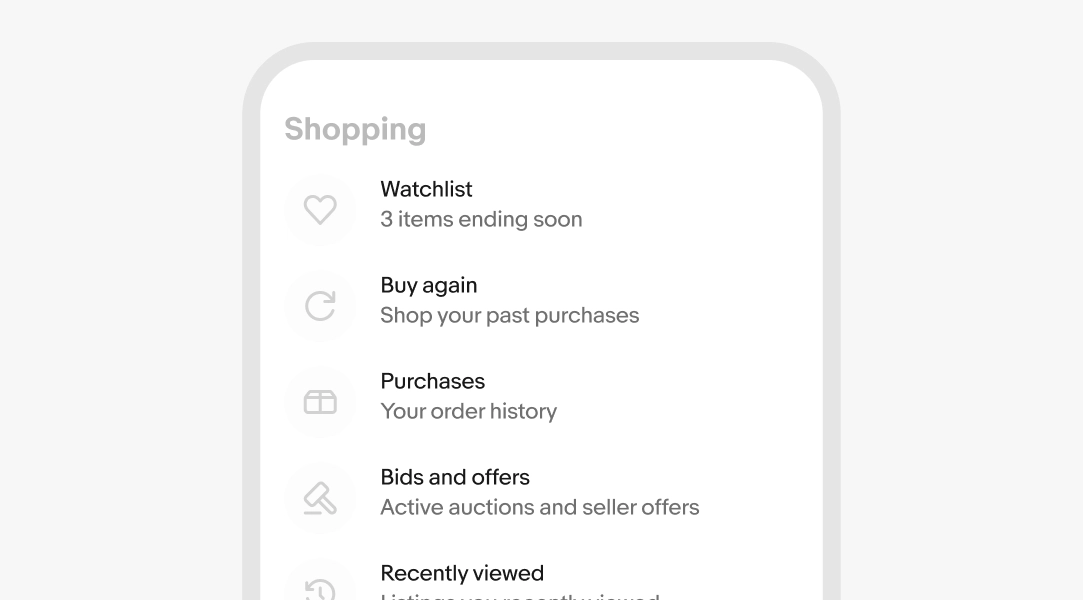
A lead accessory is optional. Common lead accessories include related icons, avatars, images, or selection controls like a checkbox or radio button. There can also be multiple lead accessories for cases like a field with an avatar and a checkbox.
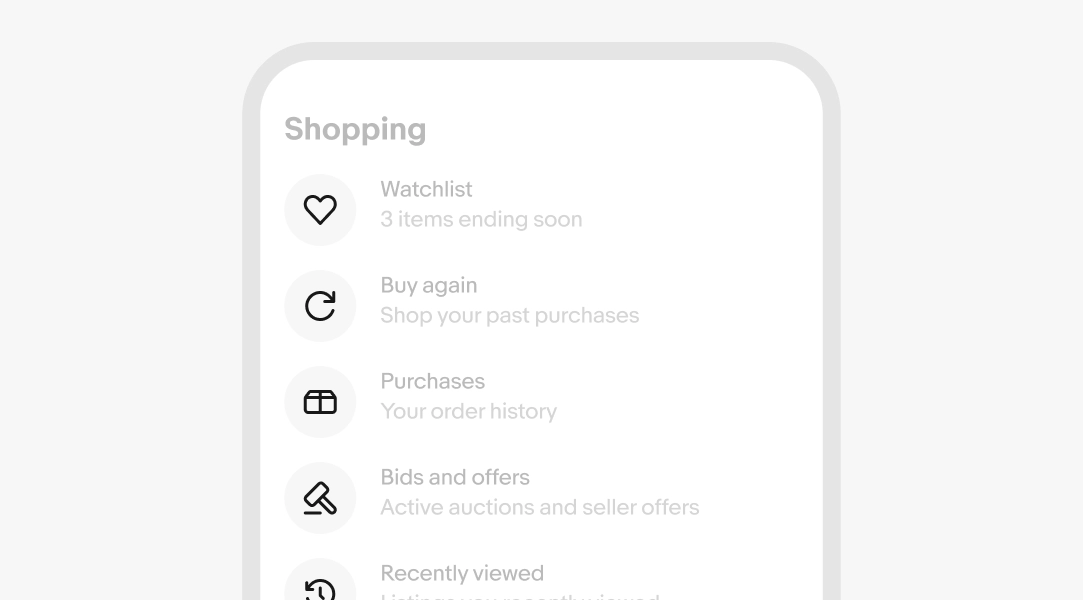
List with icons in the leading position. The UI around the icons has a lower opacity to emphasize the leading element.

Title

Required. The title is the primary label for the row. Keep it short and distinct so users can scan the list at a glance.

It can sometimes be populated directly from the backend, such as a person's name or account identifier.

  • Use sentence case
  • No ending punctuation
  • Use parallel structure
List rows with a title and supporting text in the center. The UI around the title has a lower opacity to emphasize the title layer.

Secondary text

Optional. Secondary text supports the title with additional detail. Be as specific as possible.

It can sometimes be populated directly from the backend, such as a message preview or account status.

  • Use sentence case
  • No ending punctuation, unless there's more than 1 sentence
  • Use numerals for numbers

Learn more about formatting numerals.
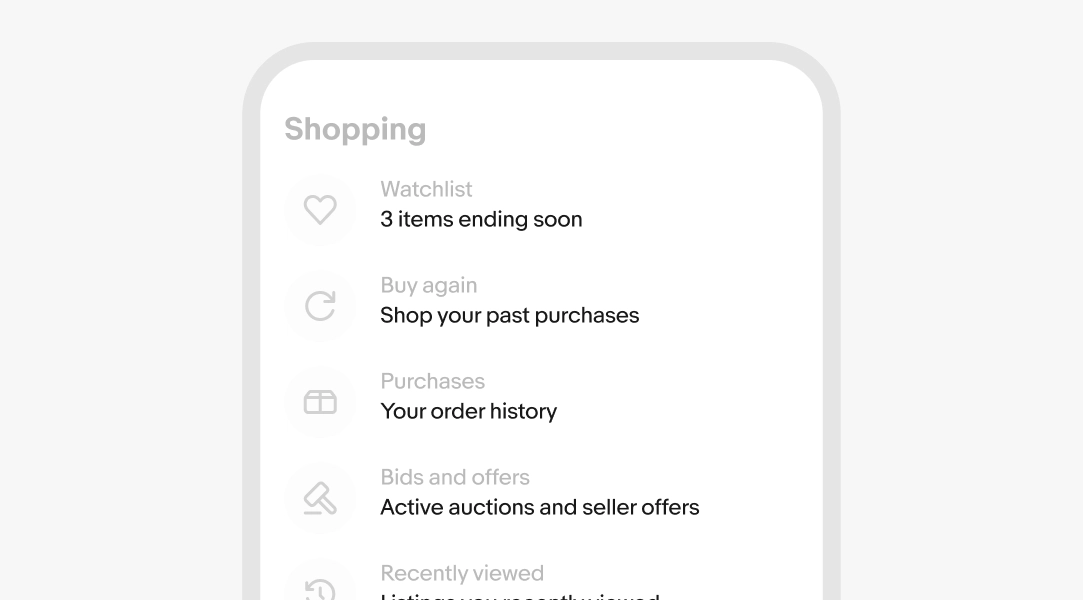
List rows with secondary text. The UI around the secondary text has a lower opacity to emphasize the text layer.

Trailing text

Optional. Trailing text adds short metadata like duration, date, and totals. This is usually populated directly from the backend.

  • Use sentence case
  • No ending punctuation
  • Use numerals for numbers

Learn more about formatting numerals.
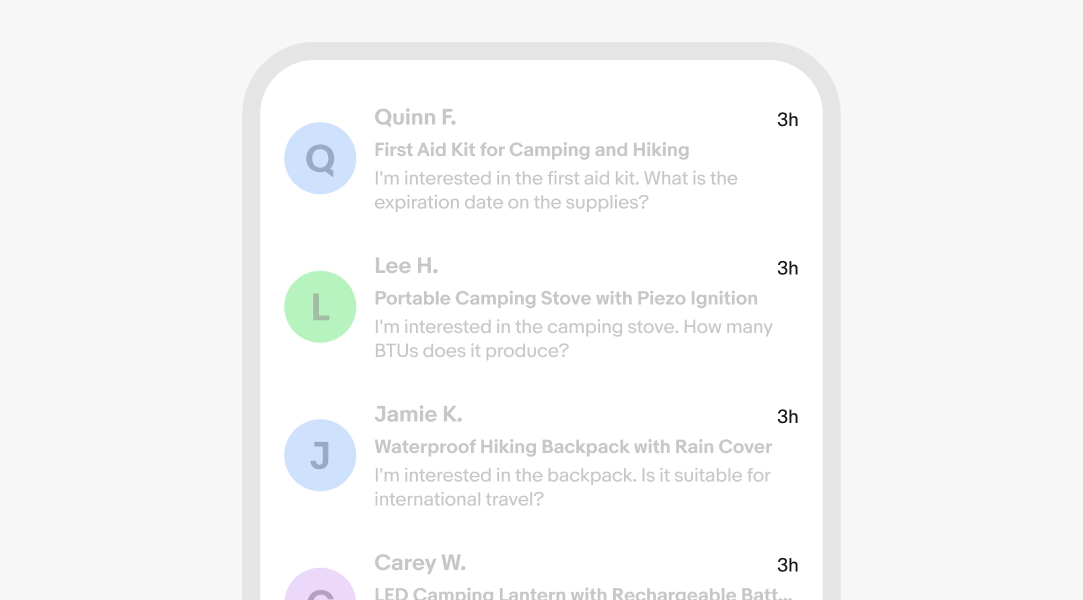
List rows with trailing text. The UI around the trailing text has a lower opacity to emphasize the trailing layer.

Trailing accessory

A trailing accessory is optional. Trailing accessories commonly afford interaction and can appear across multiple items in a single list row.

Common trailing accessories are navigation disclosure icons, external link disclosures, a toggle switch, an infotip button, or other interactive elements.
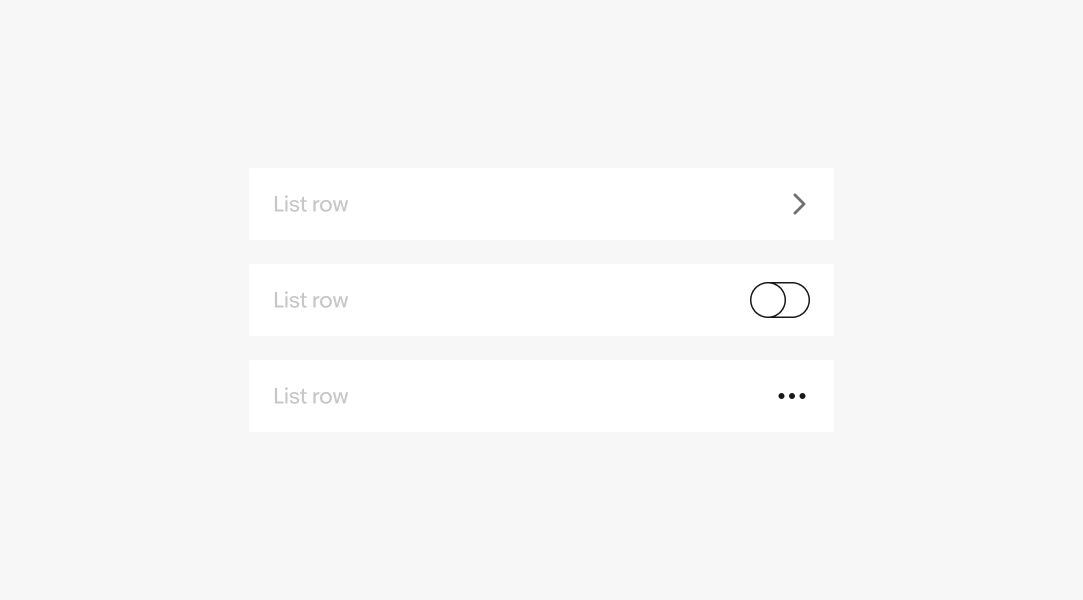
3 list rows with different trailing elements. The first has a chevron icon indicating navigation. The second has a toggle switch. And the third has an overflow icon.

Height

List rows can be set to different heights depending on the amount of its content.

The small size only includes a lead and trailing slot, and a title. Using secondary text defaults to the medium size set to two lines tall. The large size extends to three lines tall. For cases where the secondary text needs to be fully visible, use the flex size to wrap as many lines as necessary.
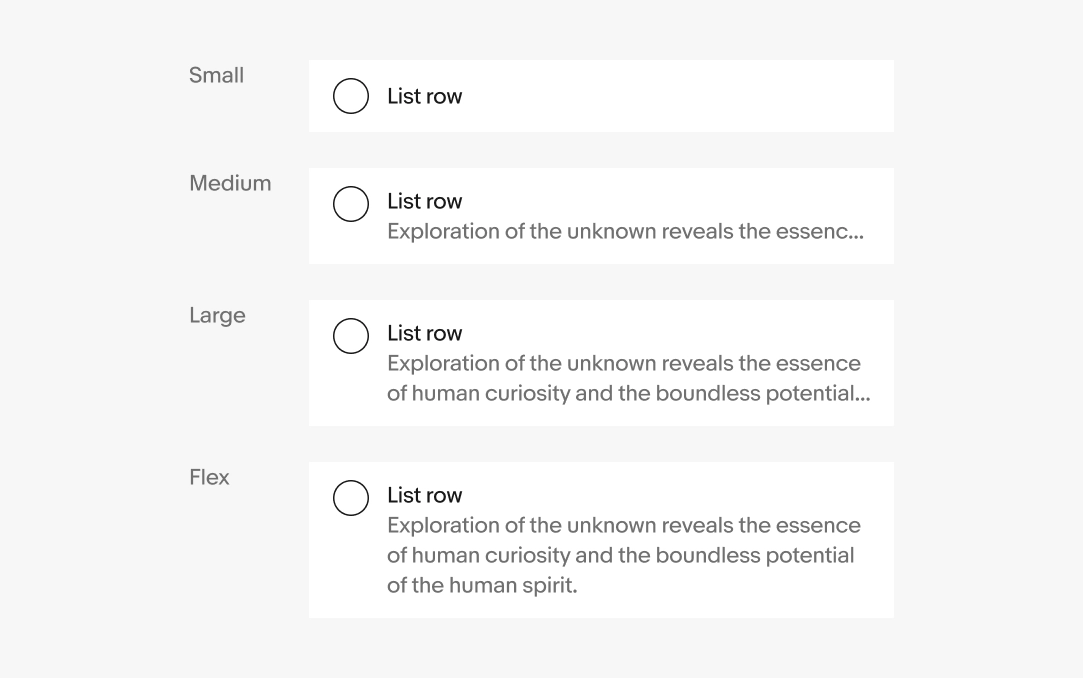
4 list rows at different heights: Small, Medium, Large, and Flexible.

Dividers

List rows can have a divider to help discern the shape of the container with dense content.
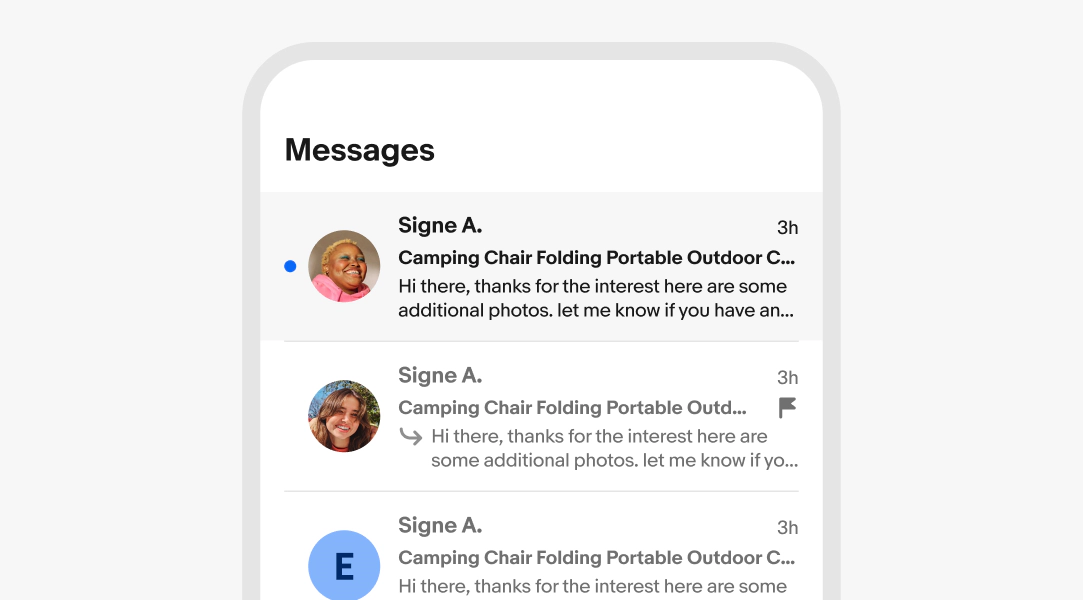
A list of messages with dividers enabled to further separate each message row.

Actionable

List rows can be directly actionable or static.

Actionable

The entire list row container is one tap target.

Static

Only nested elements are actionable.
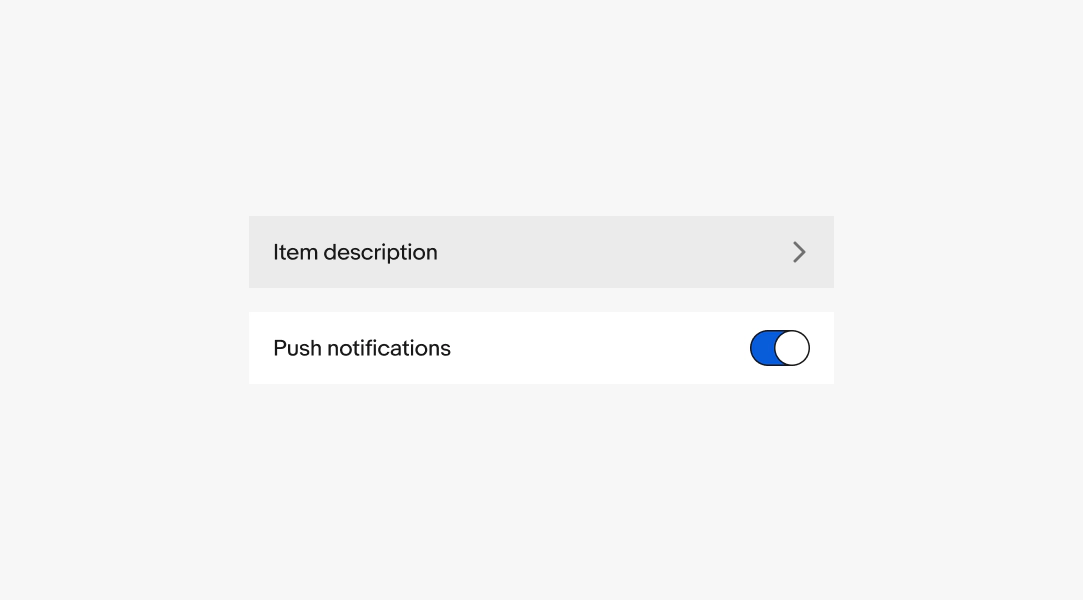
Two rows with different interaction states. The first row show a state change for the entire row background. The second row shows the state change in the trailing switch only.

Disabled items

A list row can be disabled if pre-requisites aren’t fulfilled. This is helpful for providing layout consistency and indicating that an option may become available later.
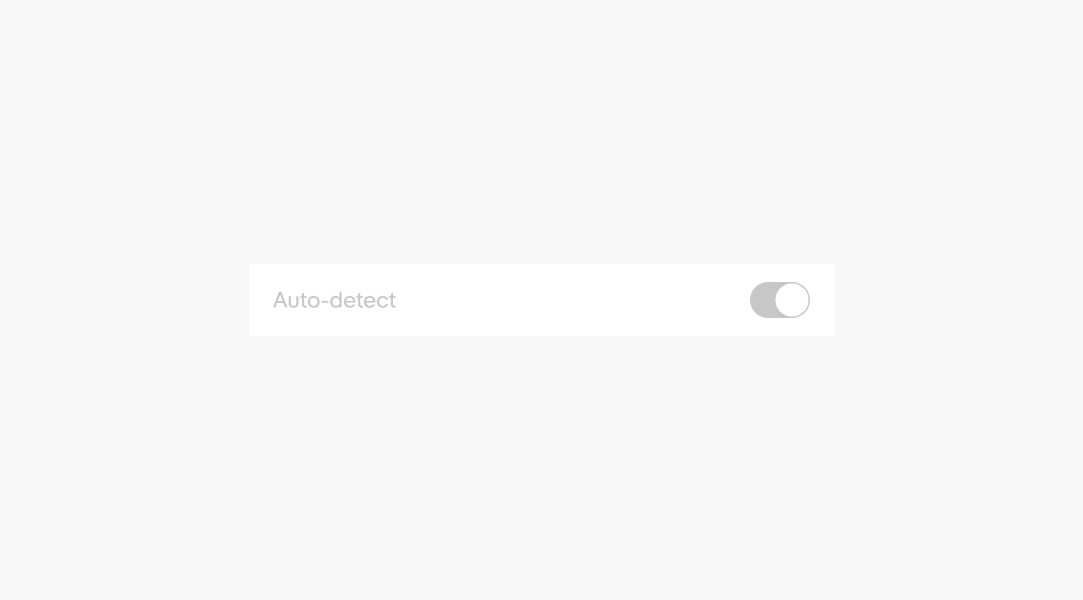
A single disabled list row. The content is light gray and the nested switch is set to a disabled state.

Behavior

Text overflow

Content expanding beyond the width of the container can either wrap indefinitely or truncate after a certain number of lines.

Content indefinitely wraps to a new line by default.

Two list rows exemplifying different text wrapping properties. The first row wraps the text indefinitely. The second row truncates at two lines.

Width

List rows flex horizontally with their parent container. The overall width is determined by the page layout.

However, avoid allowing list rows to extend larger than 480px. The main content in list rows should maintain a comfortable reading width.

A list group containing 4 list rows stretched to their recommended maximum width of 480 pixels.

Swipe actions

List rows can reveal contextual actions when swiped horizontally. Swipe actions are a touch enhancement and should never be the only way to reach an action.

Leading and trailing actions

Actions can sit on either side of the row. Leading actions, revealed by swiping from the start, typically handle frequent, non-destructive tasks. Trailing actions, revealed by swiping from the end, commonly handle destructive tasks like delete. Reserve destructive styling for actions that remove or undo data.
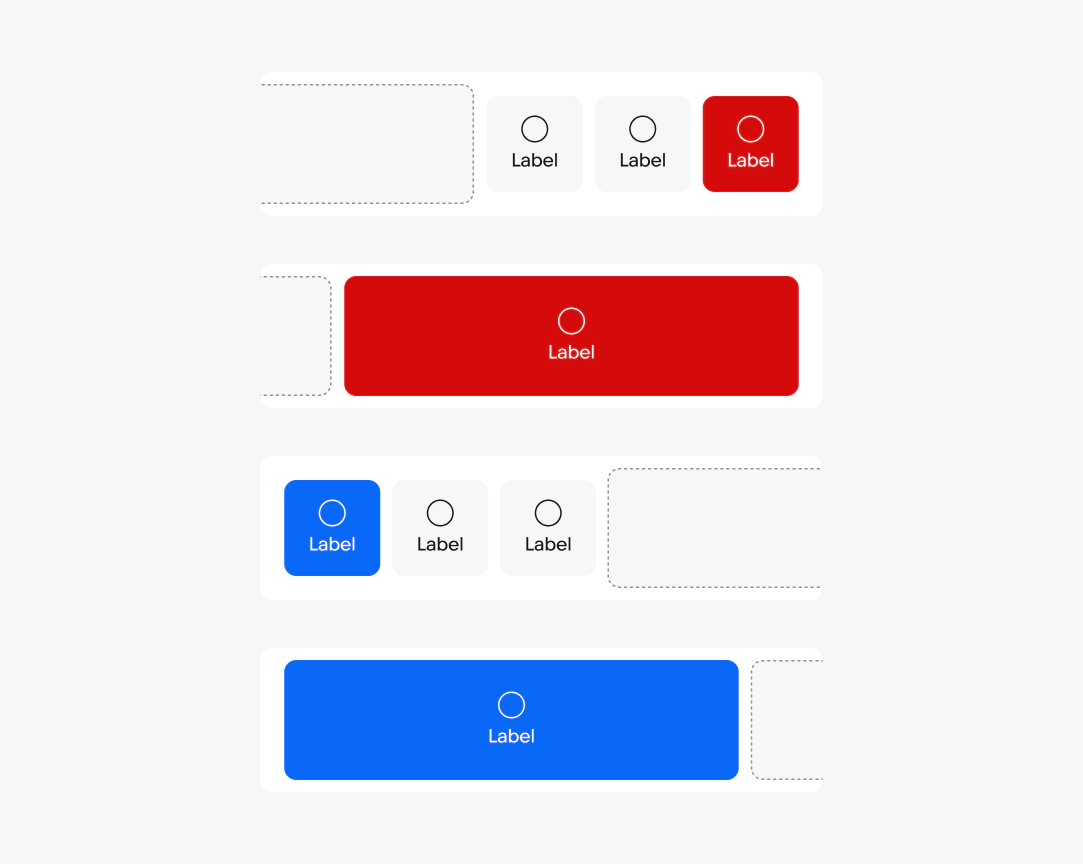
Two list rows representing messages. The top example shows a swipe left gesture revealing a context button to delete. The bottom example shows a swipe right revealing a mark as read context button.

Swipe threshold

By default, the first action commits once the row is dragged halfway across its width. A shorter swipe only reveals the buttons. This 50% default follows native iOS and Android behavior, so avoid adjusting it unless a specific action calls for it.
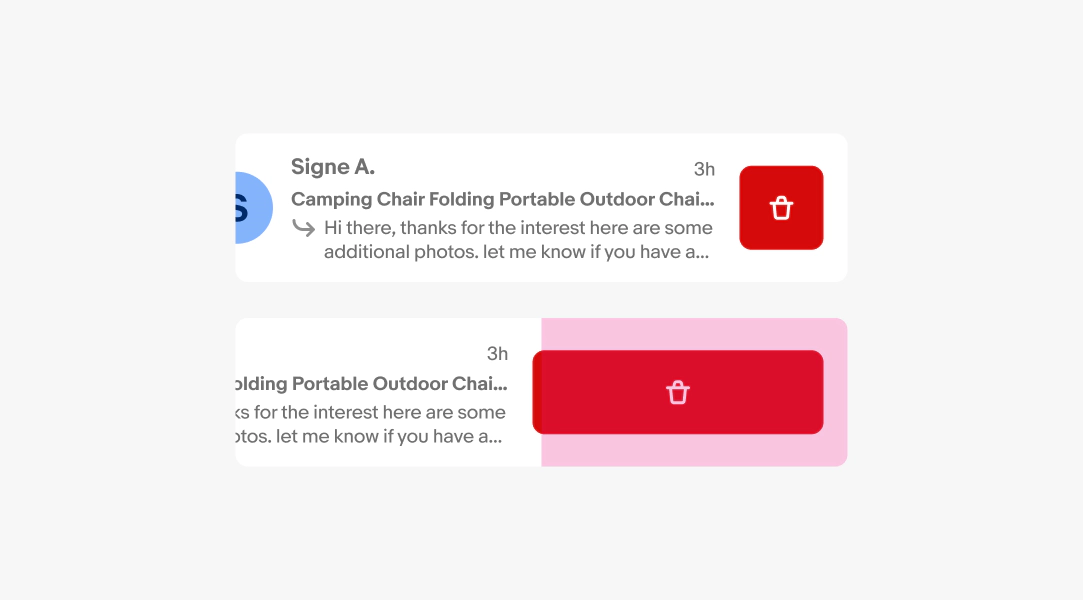
Two list rows at different swipe distances. The first example shows a partial swipe revealing the delete action but not triggering it. The second example shows the row being swiped beyond half of the row width and triggering the delete action.

Screens sizes

Small

List rows commonly expand the full width of their parent container on small screens.

A mobile screen with two sections. Each section has a section title and list group. The list rows fill the width of the screen. Each row has a single line of text in the content area and a trailing text element indicating the total number of items available for each list row.
A mobile screen with a single list group representing direct messages. The list group has 5 visible list rows, each with a leading avatar, a title and description in the content area, and a trailing text element with metadata indicating when the message was received.

Medium

List rows adjust to take advantage of the additional visible space available on medium screens. Use a multi-column layout to keep list rows to a comfortable width.
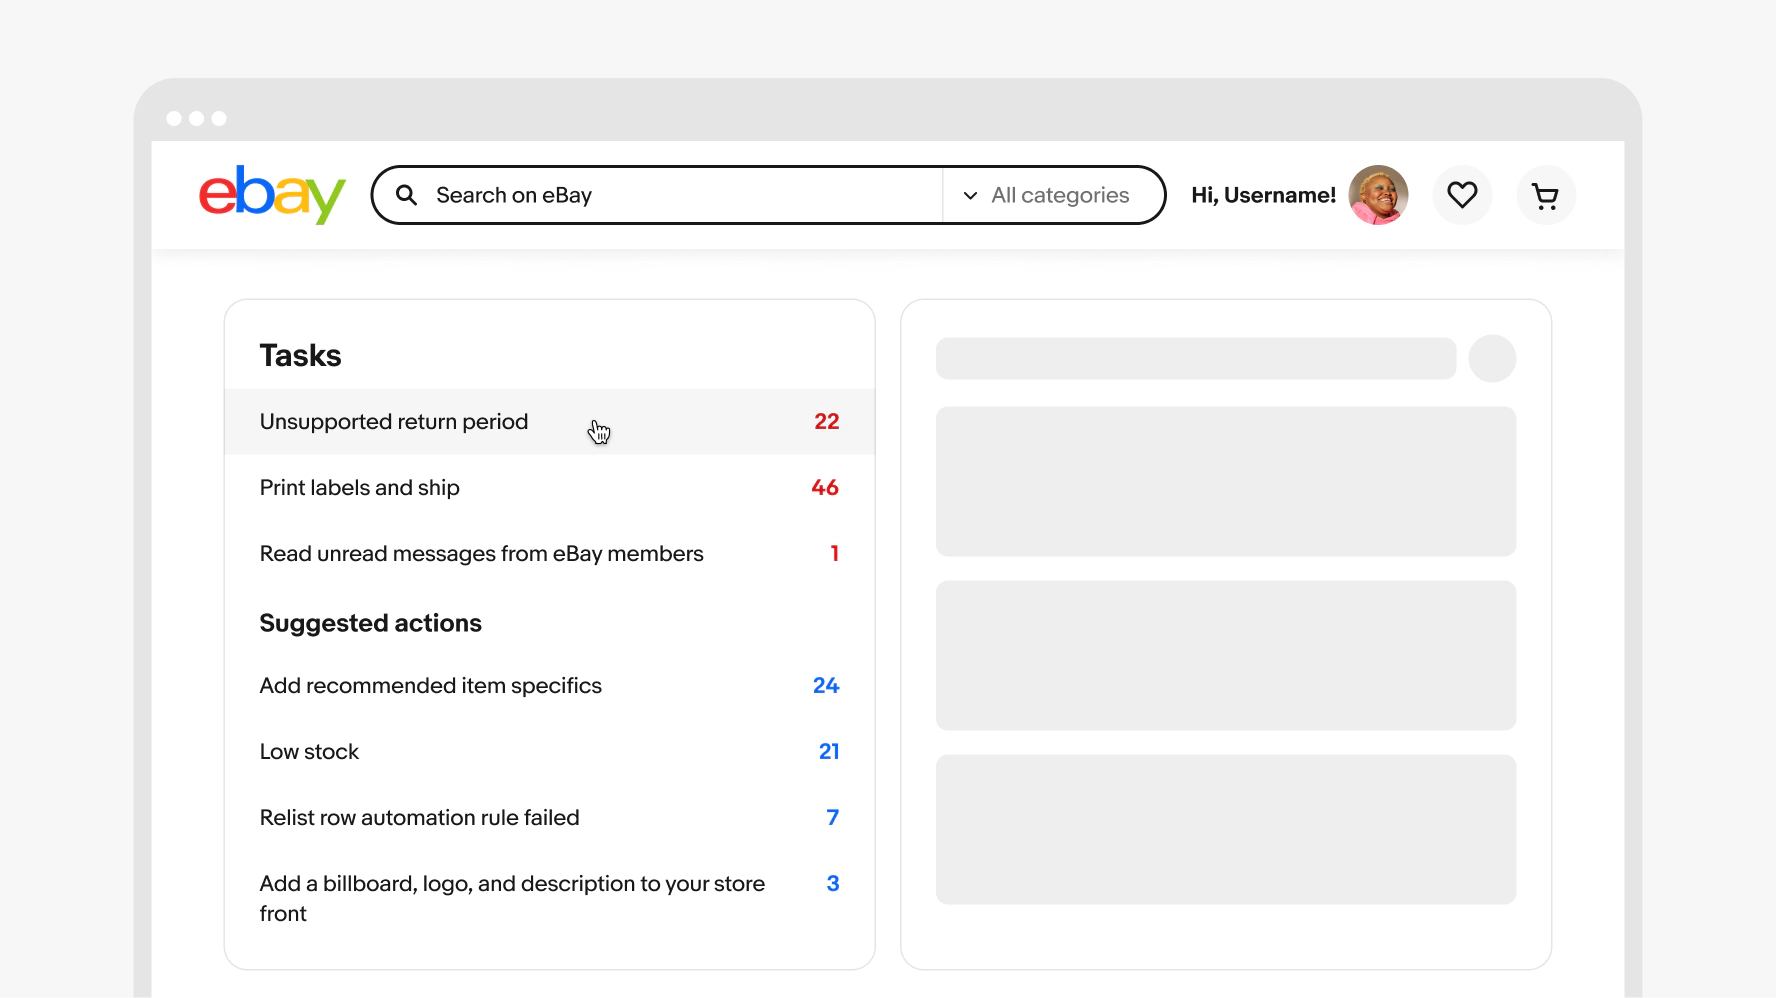
A medium screen with a navigation header and two columns. The first column has two sections, each with a section title and a list group. Each list row has a single line of text in the content area and a trailing text element indicating the total number of items available for each list row. The other column has grey boxes representing content containers.

Large

The list row width and layout adjusts on larger screens to take advantage of the additional space on large screens. Use a multi-column layout to keep list rows to a comfortable width.
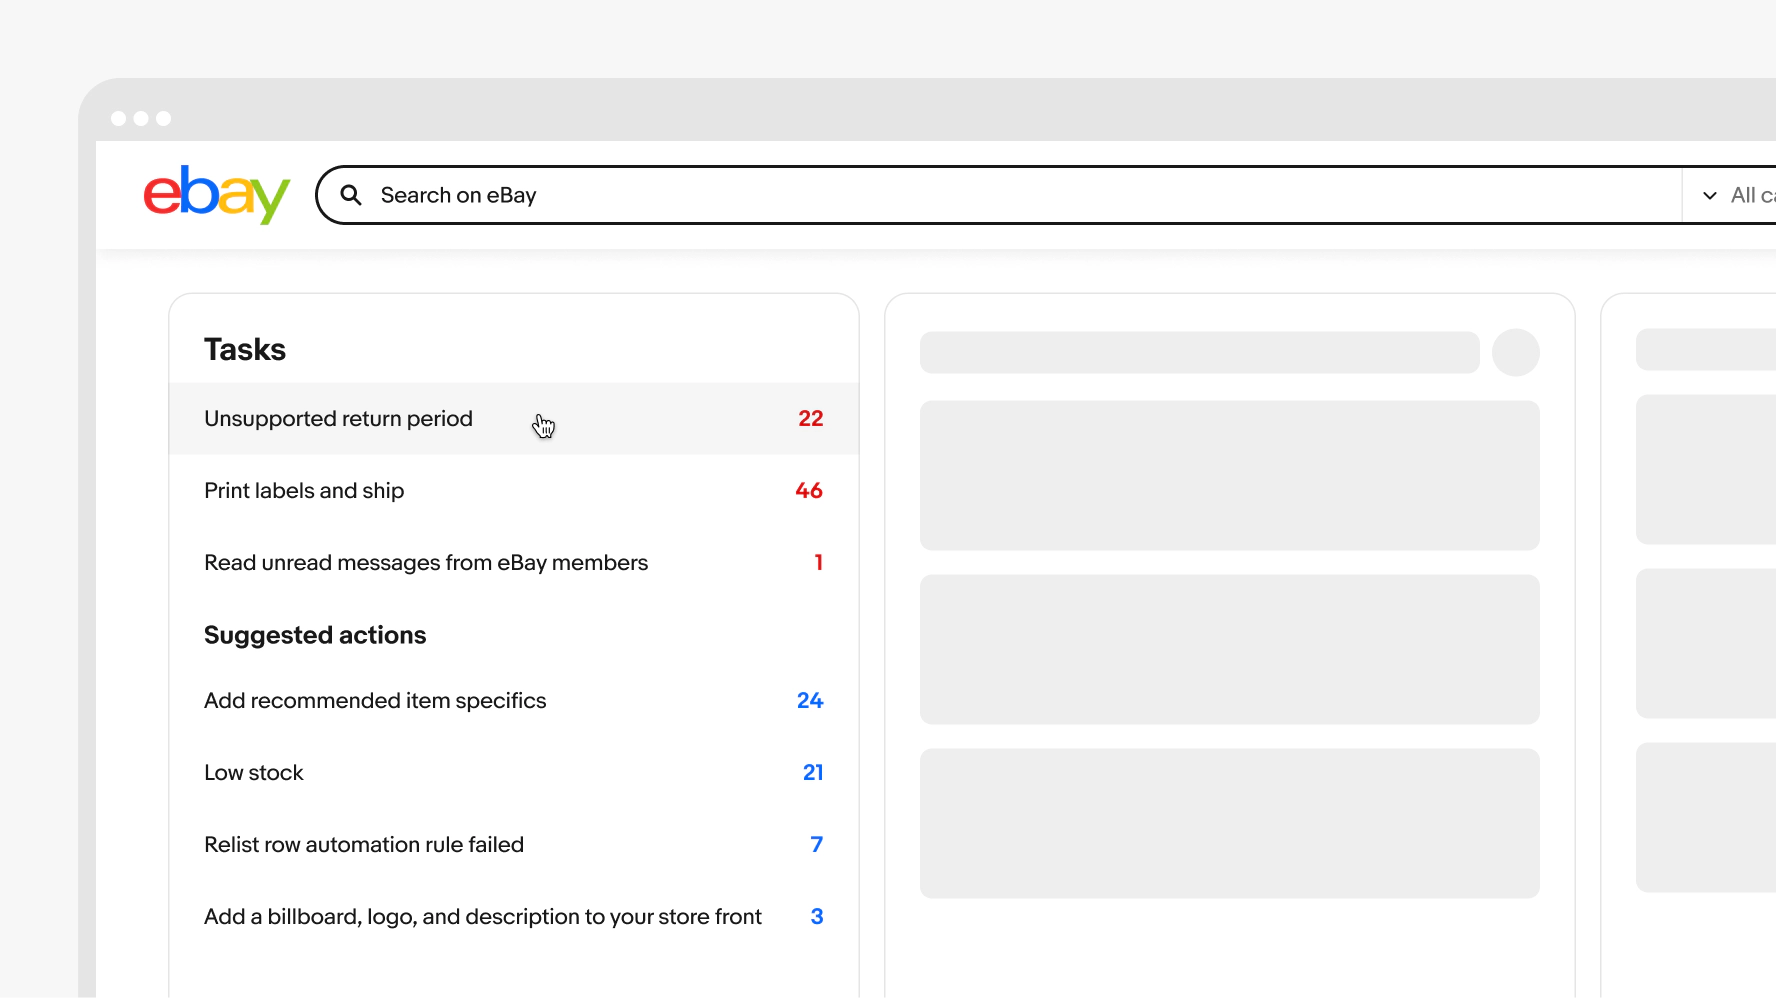
A large screen with a navigation header and three columns. The first column has two sections, each with a section title and a list group. Each list row has a single line of text in the content area and a trailing text element indicating the total number of items available for each list row. The other two columns have grey boxes representing content containers.

Best practices

Icons

Do use the same layout for list rows in a group.
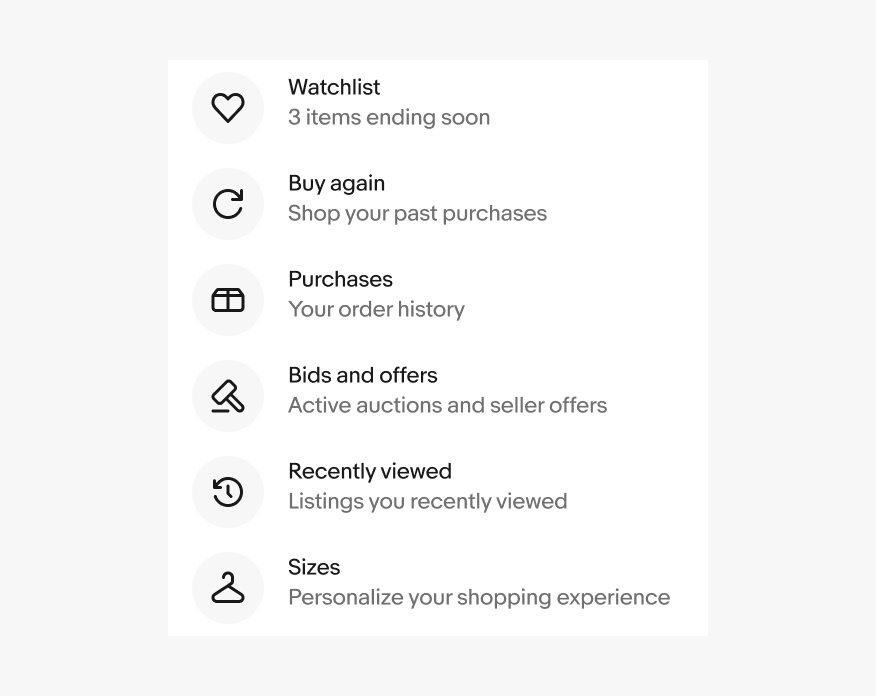
A list with 6 rows. Each list row has a leading icon and a single line of text exemplifying how list rows within a list group should have the same structure.

Don’t mix list row layouts in a group.
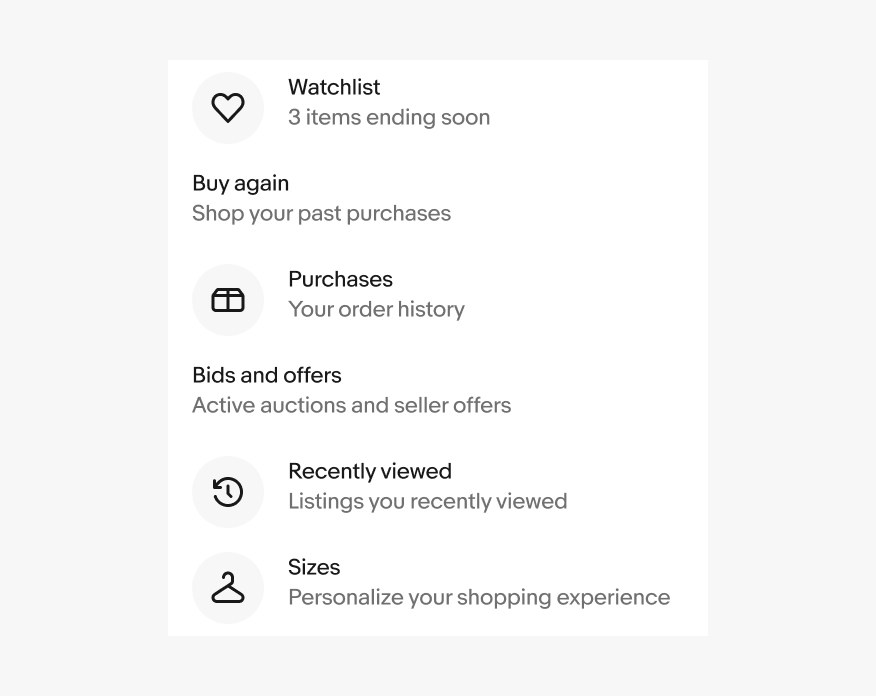
A list group with 6 list rows. Items 1, 3, 5, and 6 have a leading icon and a single line of text, while items 2 and 3 only have text, exemplifying that list rows in a group shouldn’t have different structures.

Nested elements

Do keep actionable list rows simple with a single interaction per item. If additional actions are needed, use a static list row.
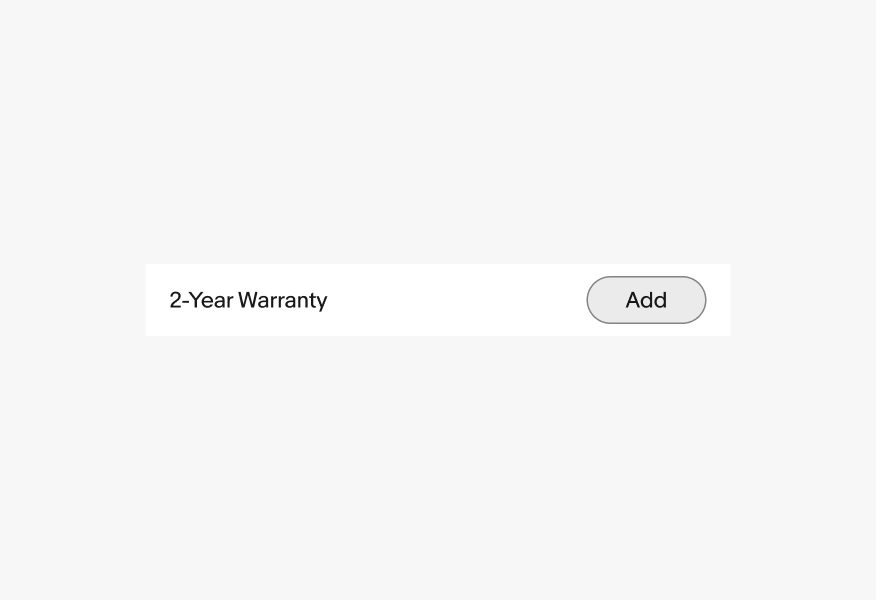
A single list row with a line of text and a trailing secondary button. The button is in a pressed state, showing that only nested interactive elements are interactive when present.

Avoid nesting multiple interactive elements in actionable list rows. This increases the chance of mistaken taps and may be difficult for users with motor issues to navigate.
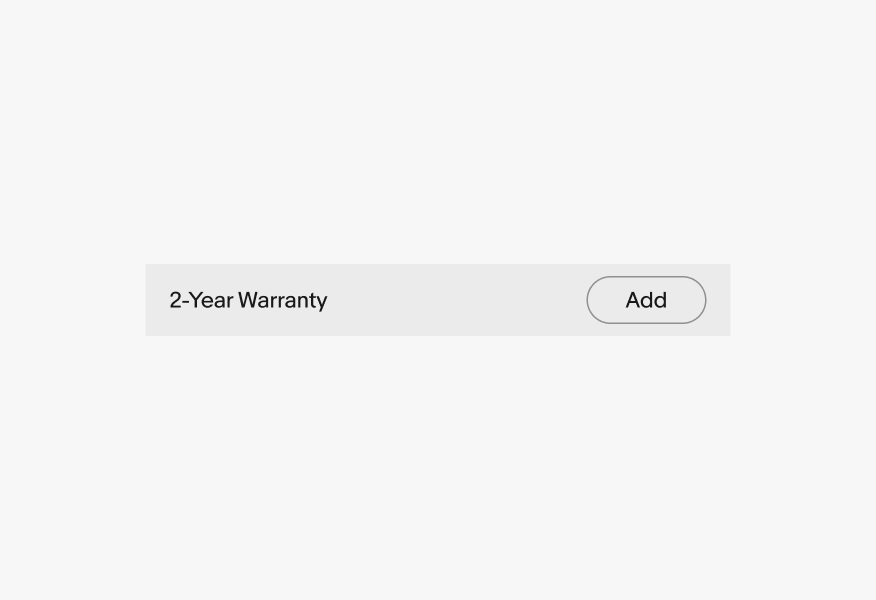
A single list row with a line of text and a trailing secondary button. The entire list row is in a pressed state. This is an example of an incorrect application of state in a list row with nested interactive elements.

Congruent list rows

Do omit dividers for congruent list rows.

A list group with 4 list rows. Each list row has a leading avatar, a title and description, and trailing metadata. This congruent list of similar elements omit dividers.

Don’t include dividers on multiple list row elements within a row group.

A list group with 4 list rows. Each list row has a leading avatar, a title and description, and trailing metadata, and dividers between each list row. This is an example of incorrect application of dividers in a congruent list.

Width

Adjust the width of the list rows by shifting to different layouts like multi-column, primary-secondary, or list-detail views.

A column with two sections, each containing a section title and list group. The column is a comfortable reading width all visible in the frame.

Avoid full width rows on larger screens. End content can be lost and the excessive line lengths make it difficult to read longer content.


A column with two sections, each containing a section title and list group. The column stretches all the way across a large screen, so the trailing metadata isn’t visible within the frame leading to difficultly tracking information across the screen.

Specs

A single list row with measurements. Elements within a list row have 16 pixels of space between them.
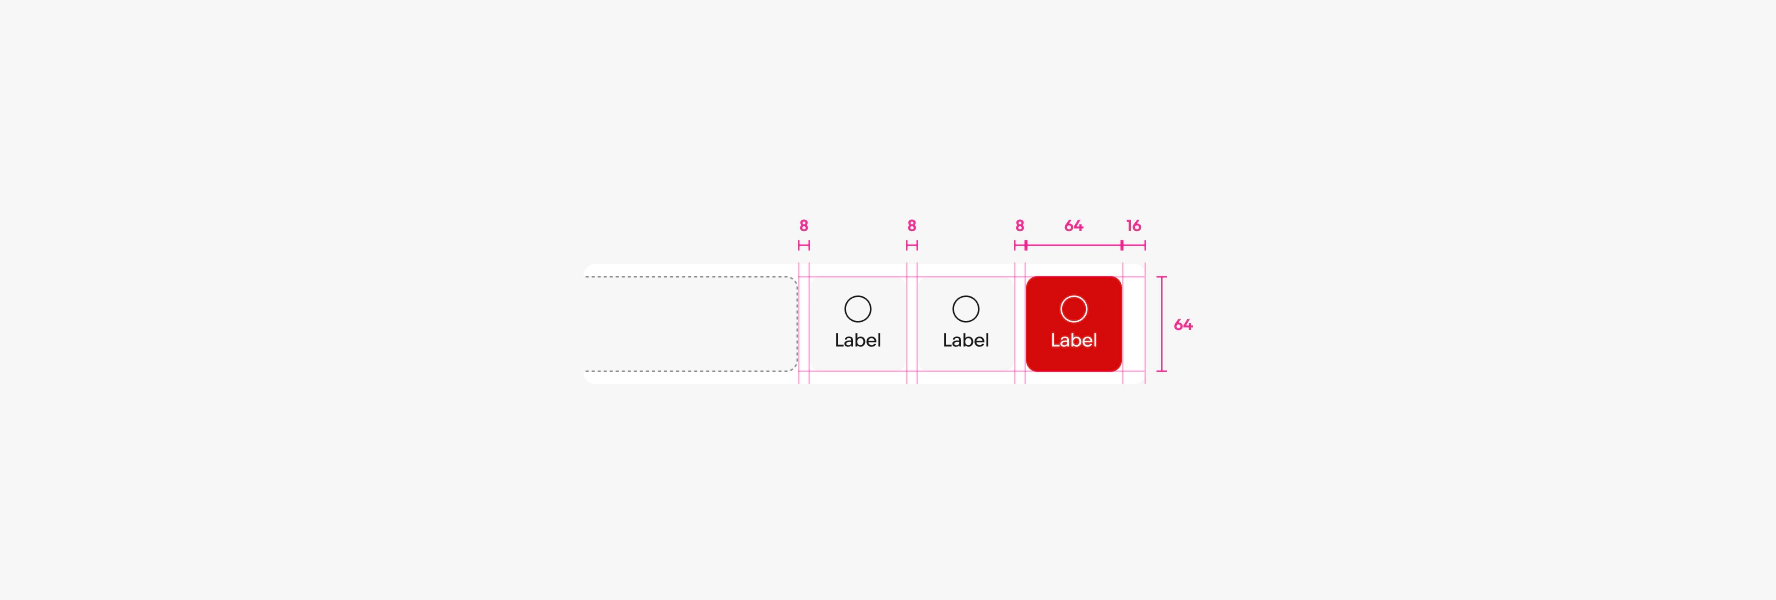
Exposed contextual action buttons 16px from the edge and 8px gap between them, and 64px by 64px in size.